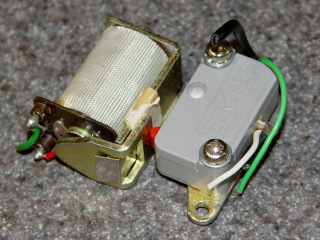
This relay-like object appeared while shoveling off the Electronics Workbench. Most likely, it started life in the white-goods world, where recurring cost is everything:
Now, doesn’t that look just like a tool length probe? It’s certainly less hideous than the one that’s been working fine on my Sherline mill, ever since I figured out how to make tool length probing work.
Here’s what caught my eye:
- Plenty of switch overtravel
- Nice metal bracket with screws
- All the vital pieces in one convenient assembly!
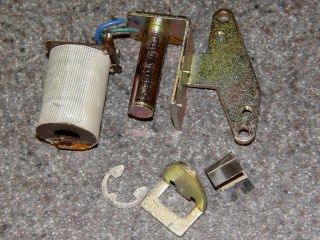
Some brute force removed the spring and actuator, a few shots with a chisel broke the adhesive holding the coil in place, and this collection of parts emerged relatively unscathed:
Another shot with a pin punch removed the post from the frame. I intended to un-bend the L-shaped feature that held the post, enlarge the hole, and screw it to the mill. Alas, they formed the angle by notching the steel and it cracked when I un-bent it. No great loss.
The two bumps on the frame held the (now defunct) restoring spring. I simply filed those off while cleaning up the broken edges.
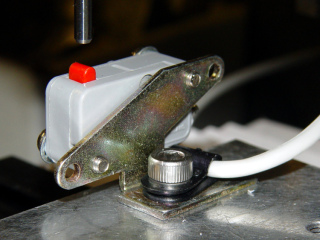
Drill a 10-32 clearance hole, solder a cable with a 3.5 mm stereo plug to the switch, add a plastic cable clamp, screw it to the end of the tooling plate, and it’s all good. That’s the butt end of a broken 2 mm end mill poking down from the spindle…
Does it work any better than the previous kludge?
A G-Code routine that displays the Z-axis coordinate where the switch trips looks like this:
(Tool length probing test)(--------------------)( Initialize first tool length at probe switch)( Assumes G59.3 is still in machine units, returns in G54)( ** Must set these constants to match G20 / G21 condition!)#<_Probe_Speed> = 400 (set for something sensible in mm or inch)#<_Probe_Retract> = 1 (ditto)O<Probe_Tool> SUBG49 (clear tool length compensation)G30 (move above probe switch)G59.3 (coord system 9)G38.2 Z0 F#<_Probe_Speed> (trip switch on the way down)G0 Z[#5063 + #<_Probe_Retract>] (back off the switch)G38.2 Z0 F[#<_Probe_Speed> / 10] (trip switch slowly)#<_ToolZ> = #5063 (save new tool length)G43.1 Z[#<_ToolZ> - #<_ToolRefZ>] (set new length)G54 (coord system 0)G30 (return to safe level)O<Probe_Tool> ENDSUB(-------------------)(-- Initialize first tool length at probe switch)O<Probe_Init> SUB#<_ToolRefZ> = 0.0 (set up for first call)O<Probe_Tool> CALL#<_ToolRefZ> = #5063 (save trip point)G43.1 Z0 (tool entered at Z=0, so set it there)O<Probe_Init> ENDSUB(--------------------)( Set up length)G21 ( metric units)(msg,Verify G30.1 above tool change switch, hit Resume)M0(msg,Verify blunt tool installed, hit Resume)M0O<Probe_Init> CALL(debug,Initial Z trip = #<_ToolRefZ>)O100 REPEAT [10]O<Probe_Tool> CALL#<DeltaZ> = [#<_ToolZ> - #<_ToolRefZ>](debug,Z trip=#<_ToolZ> DeltaZ=#<_DeltaZ>)O100 ENDREPEATM2 |
Which produced these results:
Trial Z-axis mm Delta mm1 26.376973 -0.0000002 26.376307 -0.0006663 26.374976 -0.0019974 26.376307 -0.0006665 26.375641 -0.0013326 26.374310 -0.0026637 26.374976 -0.0019978 26.373645 -0.0033289 26.373645 -0.00332810 26.372979 -0.00399411 26.372979 -0.003994 Maximum -0.000000 Minimum -0.003994 Range 0.003994 |
Notice that the results have six figures after the decimal point, but they’re really less precise: you’ll find four pairs of duplicates, which seems highly unlikely. I think the values are quantized to about 25 µ-inch and displayed as whatever the metric equivalent might be.
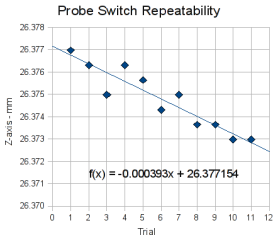
The corresponding plot looks like this:
The trend line is highly suspect, but the slope shows that the trip point gets lower by one wavelength of violet light (393 microns) per trip. The total difference is a whopping 0.004 mm during the test, call it 160 millionth of an inch.
Both of those are better, by roughly a factor of two, than the previous probe switch.
Bottom line: That is OK for the sort of machining I do ship it!


